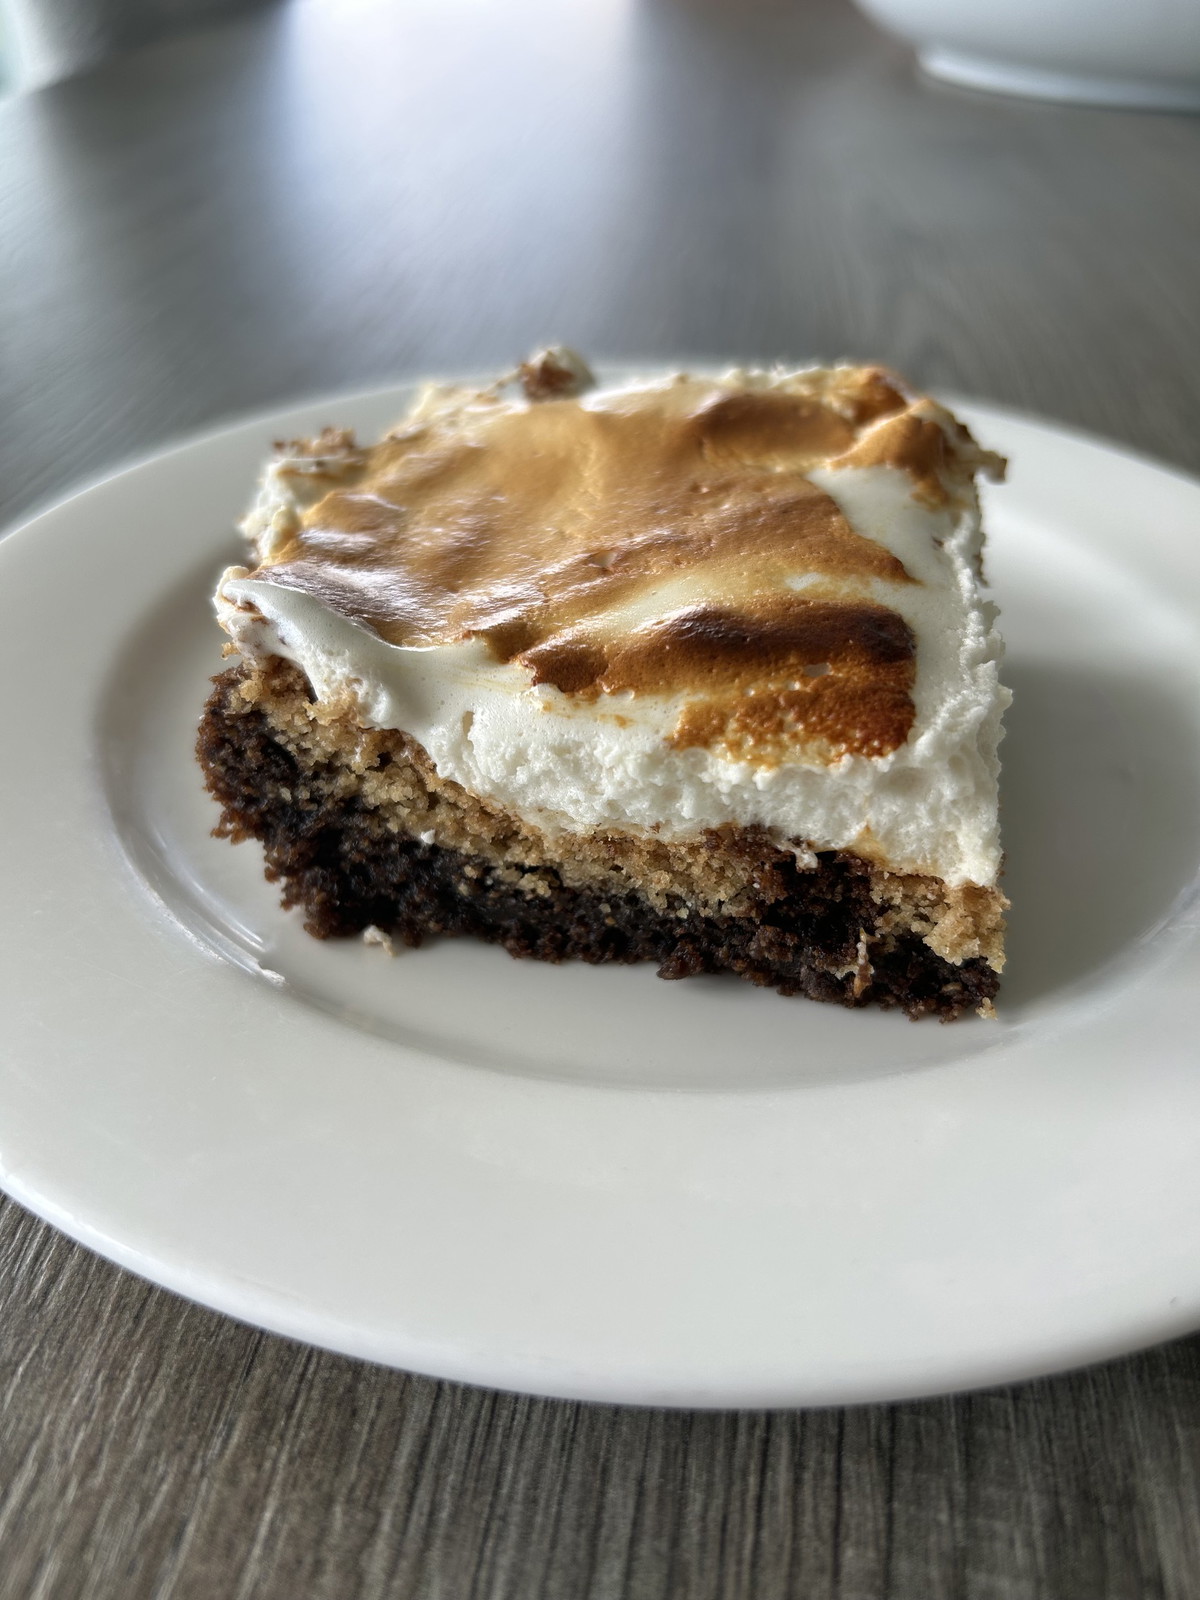
The Ultimate S’mores Choconot Brownie — Allergy-Friendly & AIP too!

July 23, 2026


There’s something magical about s’mores. The combination of rich chocolate, gooey toasted marshmallow, and sweet cookie goodness brings back memories of campfires, summer nights, and sharing desserts with the people you love.

At eat G.A.N.G.S.T.E.R., we believe everyone deserves to enjoy those nostalgic flavors—regardless of food allergies or dietary restrictions. That’s why we created our S’mores Choconot Brownie recipe using our Chewy Choconot Brownie Mix and Sugar Cookie Mix. The result is an indulgent dessert that captures everything you love about classic s’mores while remaining free from the top food allergens. Even friends and family who don’t have food allergies can’t seem to get enough!

Eat G.A.N.G.S.T.E.R. S’mores Choconot Brownies

For the Brownies

  • 1 package Eat G.A.N.G.S.T.E.R. Brownie Mix
  • 1 package Eat G.A.N.G.S.T.E.R. Sugar Cookie Mix

Prepare the brownie and sugar cookie mixes according to their package directions.  Then, in a 9x9 pan, spread the Brownie layer first and then spoon (or “blop!) the cookie dough atop the brownie batter (you will like have extra cookie dough to use for another time!).  Bake at 350F for 20-28 minutes.  While things bake, work on your topping!

For the Marshmallow Topping

Ingredients

  • 1 cup water, divided
  • 3 tablespoons unflavored gelatin powder
  • 1 cup lightly colored raw honey (creamed honey works beautifully)
  • 1 teaspoon pure vanilla extract

Directions

  1. Pour ½ cup of the water into the bowl of a stand mixer fitted with the whisk attachment. Sprinkle the gelatin over the water and let it bloom for about 10 minutes.
  2. In a saucepan, combine the remaining ½ cup water and the honey. Bring to a boil over medium-high heat and continue boiling until the mixture reaches 240°F on a candy thermometer, about 15 minutes.
  3. Turn the mixer to low and slowly pour the hot honey syrup down the side of the bowl while mixing. Add the vanilla extract.
  4. Increase the mixer speed to medium-high and whip for about 10 minutes. The mixture will transform from a light brown color to bright white and triple in volume.
  5. Spread the marshmallow topping evenly over the cooled brownies and allow it to set for approximately 6 hours.
  6. Finish by toasting the marshmallow with a kitchen torch, or place it under the broiler for 1–2 minutes. Watch carefully—it browns very quickly!

Bonus Tip: If you have extra marshmallow cream, spread it onto a parchment-lined tray dusted with arrowroot powder. Sprinkle more arrowroot powder over the top and let it set for about 6 hours. Cut into squares and store in an airtight container for up to two weeks for homemade marshmallow treats.

Whether you’re making dessert for a family gathering, a celebration, or simply satisfying a craving, these S’mores Choconot Brownies deliver all the nostalgic flavor of a campfire classic in a dessert everyone can enjoy. One bite, and you’ll understand why this recipe has become a favorite with allergy-friendly eaters and dessert lovers alike!

More articles

ALLERGEN FRIENDLY S'MORES BROWNIES

Kerry Brown
Category

Dessert

Bring the campfire classic home with these allergen-friendly S'mores Brownies! A buttery Eat G.A.N.G.S.T.E.R. Sugar Cookie crust serves as the perfect gluten-free "graham cracker" layer, topped with rich Eat G.A.N.G.S.T.E.R. Chewy Choconot Brownie Mix and finished with a fluffy homemade honey marshmallow toasted until golden. This dairy-free, gluten-free twist on the classic s'more is an irresistible dessert for parties, holidays, or any chocolate lover.


Ingredients

    Chocolate/Brownie Layer

    • 1 pouch Eat G.A.N.G.S.T.E.R. Chewy Choconot Brownie Mix
    • 2/3 cup maple syrup
    • ⅓ cup oil (we recommend avocado oil

    Graham Cracker/Sugar Cookie Layer

    • 1 pouch Eat G.A.N.G.S.T.E.R. Sugar Cookie Mix
    • ⅓ cup oil (we recommend avocado oil)
    • ½ cup warm maple syrup

    Marshmallow Topping

    • 1 cup water
    • 3 Tablespoons unflavored gelatin powder
    • 1 cup lightly colored raw honey (we used creamed honey)
    • 1 teaspoon pure vanilla extract

    Directions

    1. Preheat oven to 350F.

    Chocolate/Brownie Layer

    1. In a microwave-safe container, combine maple syrup and oil. Microwave on high for one minute.
    2. In a medium-sized bowl, add the entire contents of pouch and the combined maple syrup and oil. Mix.
    3. Pour the batter into a lightly greased 8x8 pan.

    Graham Cracker/Sugar Cookie Layer

    1. In a medium-sized bowl, combine entire contents of cookie mix with oil and maple syrup.
    2. Let sit 10 minutes.
    3. Take blobs of sugar cookie dough and sporadically plop them on top of the brownie batter, pressing slightly.
    4. You may have sugar cookie dough left over, so set aside and make cookies after!
    5. Bake the two layers for 26-28 minutes and let cool completely on the counter top.

    Marshmallow Layer

    1. Into the bowl of a stand mixer with the whisk attachment, pour ½ of the water into the bowl and sprinkle the gelatin on top. Allow the gelatin to bloom, or absorb the water for about 10 minutes.
    2. Combine the remaining ½ cup water and the honey in a saucepan. Bring to a boil over medium high heat and boil for about 15 minutes, or until a candy thermometer reads 240 degrees.
    3. Turn the mixer on low, and with it running, slowly pour the hot honey syrup down the side of the bowl. Add the vanilla, then increase the speed of the mixer to medium high and beat for 10 minutes. The mixture will turn from brown to white and triple in volume.
    4. Pour and spread the marshmallow cream over the top of the brownies and allow to set for about 6 hours.
    5. Use a kitchen torch to brown the marshmallow OR put under the broiler for just a couple minutes—watch closely if you choose the broiler method, because it browns VERY quickly!
    6. *If you have extra marshmallow cream, quickly spread it on to a parchment lined tray that has been sprinkled with arrowroot powder. Sprinkle more arrowroot powder on top and allow to set for about 6 hours. Cut into squares and keep in an airtight container for up to 2 weeks.